Skip to content

Sauna, Cold Plunge & Hot Tub Manufacturer OEM / ODM

Request a Quote →

Site-ready procurement

Sauna and Cold Plunge Installation Planning

A well-planned installation gives the buyer a product that can reach its final position, connect to suitable services and remain accessible for routine care. Bropool helps project teams identify the questions attached to the selected sauna, cold plunge or hot tub before the order is frozen.

Bropool sauna and cold plunge installation planning starts with the model under consideration, destination, site type, delivery route, base or floor, available utilities and the local professionals involved. Bropool can then provide the available model information for quotation and coordination. Final structural design, permits, utility sizing, local code checks and site connections remain with appropriately qualified local parties.

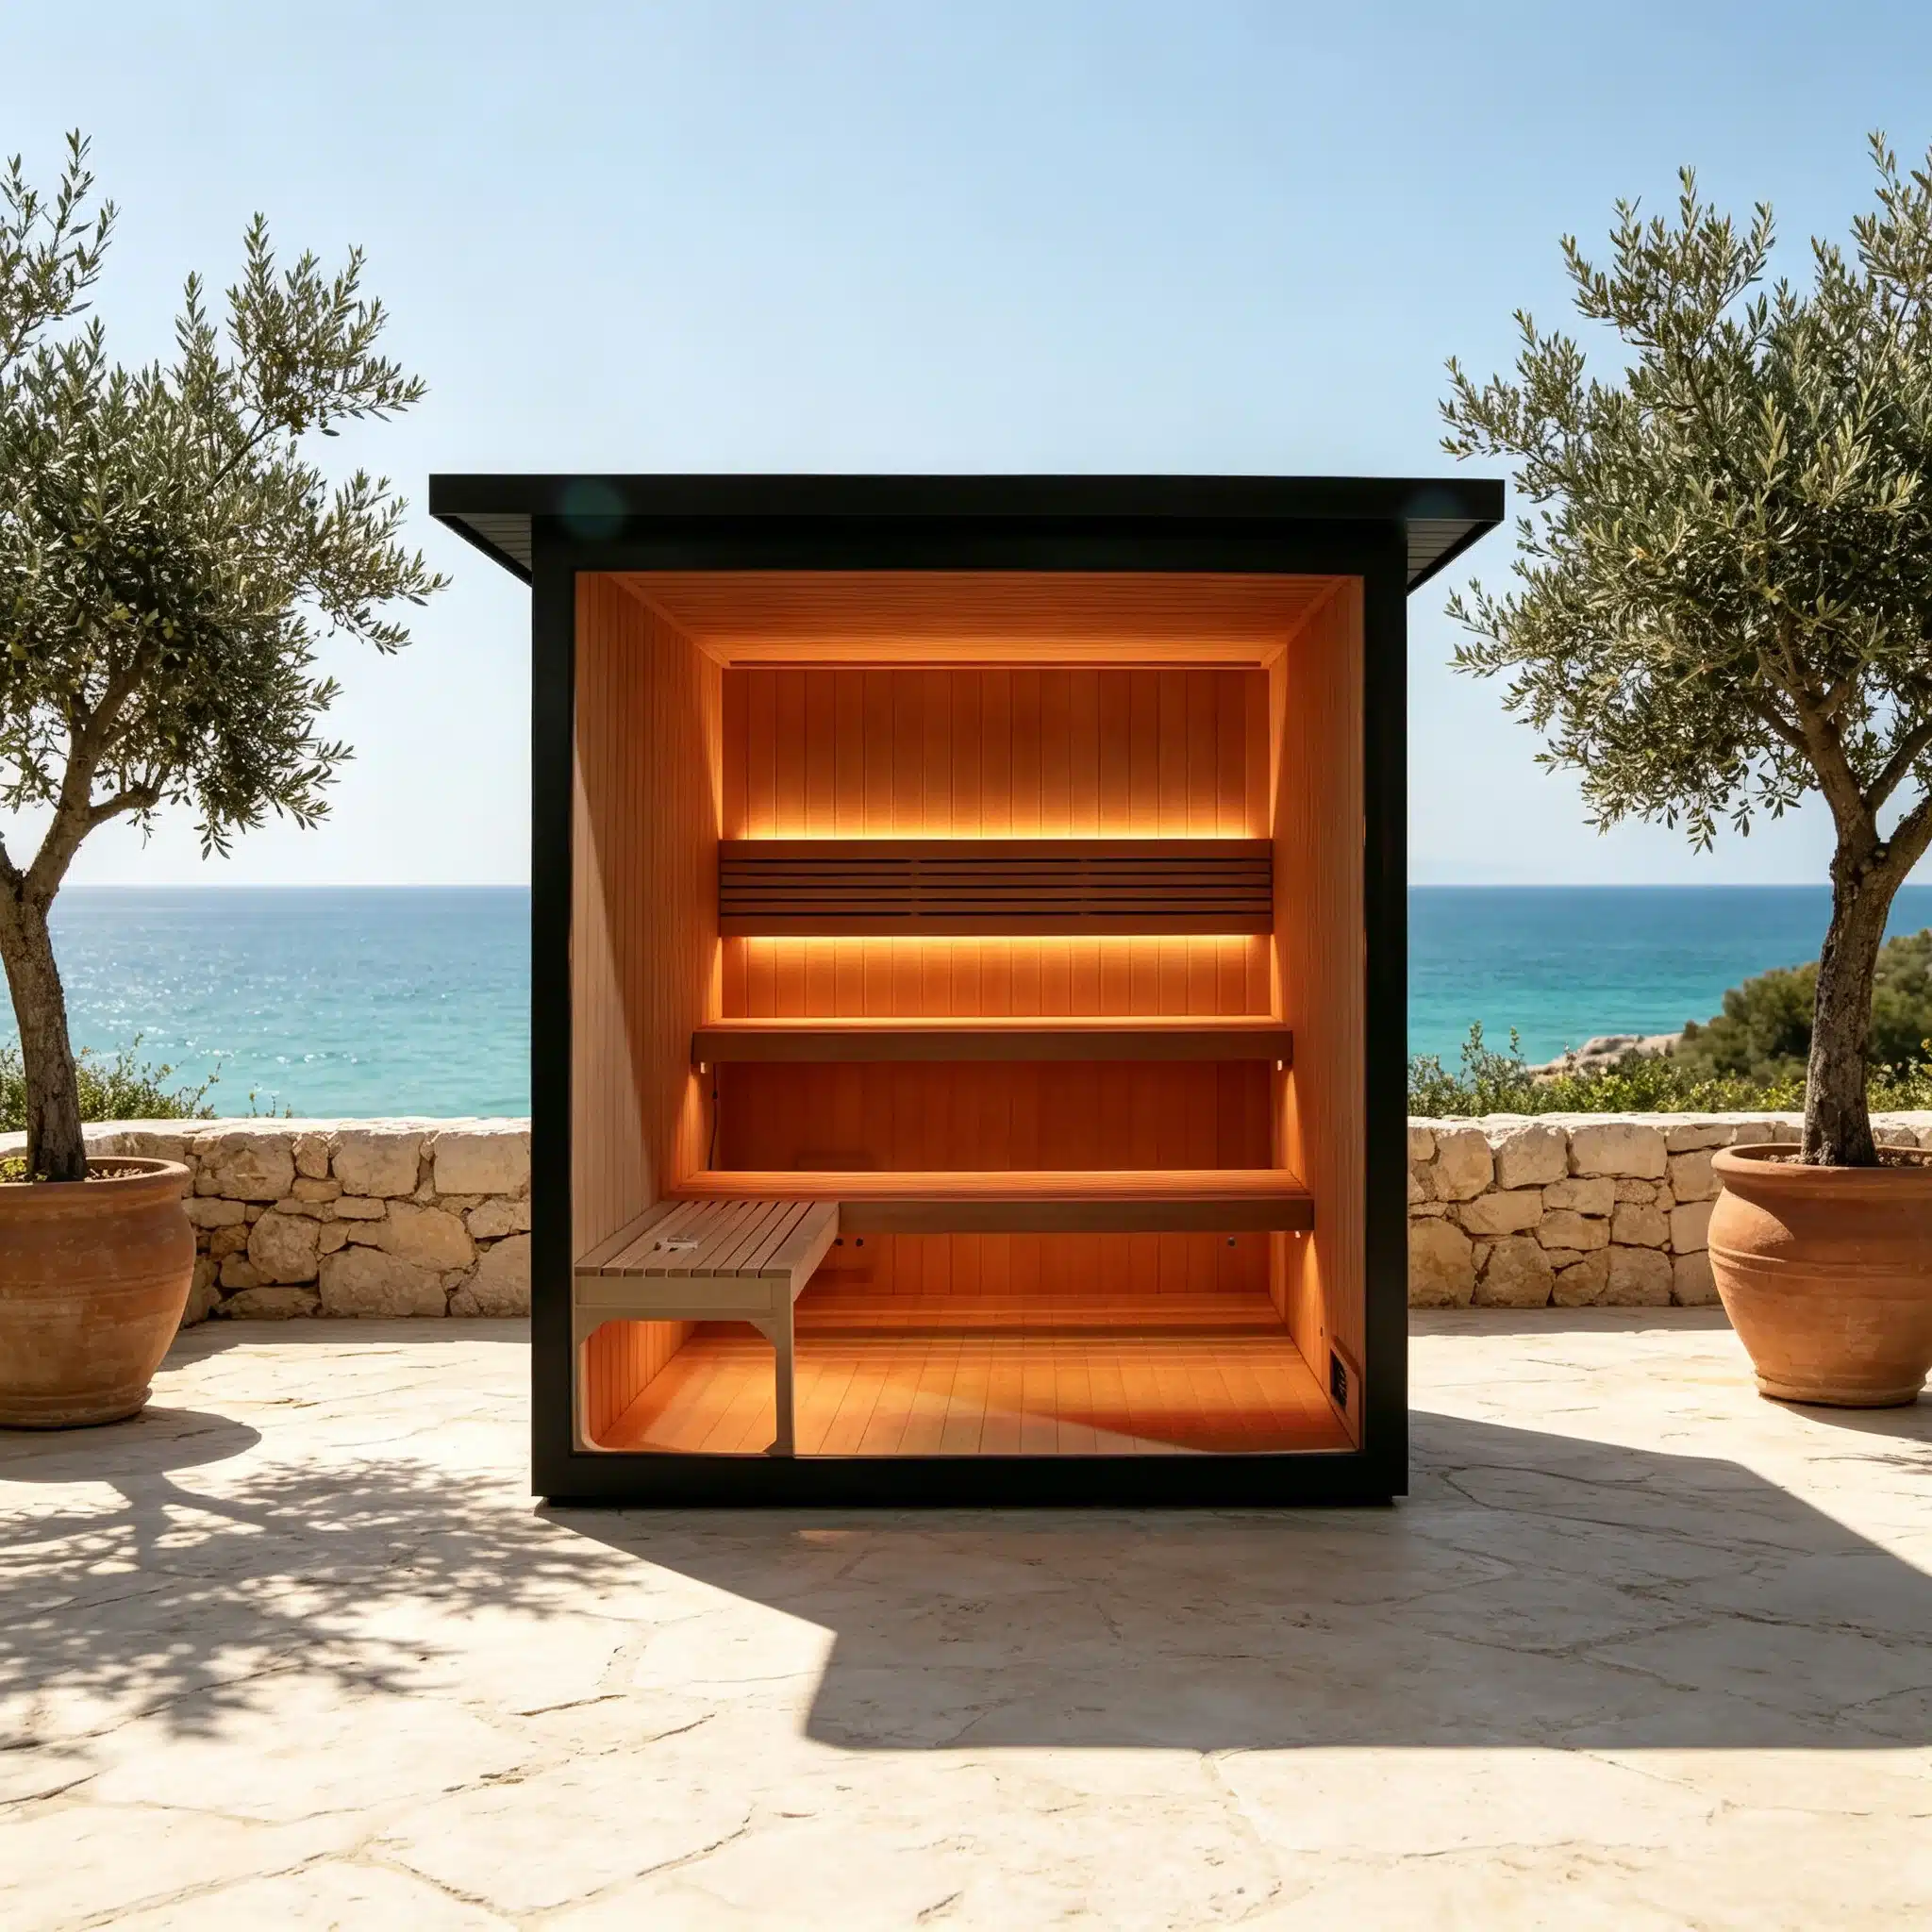
Bropool outdoor sauna concept visualization for placement planning
Concept visualization for placement discussion. It is not a completed customer site and does not define final dimensions, clearances or connection points.

Responsible organization: Bropool. Prepared and reviewed by Bropool for procurement and site coordination. Final installation instructions must match the selected model, destination and qualified local work.

· Contact Bropool for the current record or a project-specific answer.

What the buyer gains

Choose a product path that the site can actually support

Installation questions change with the equipment. Comparing these requirements early helps procurement avoid selecting a form, heater, chiller arrangement or access method that conflicts with the building or outdoor area.

01 · SAUNA

Coordinate cabin, heat and airflow

Confirm the cabin dimensions, assembly method, doorway and corridor limits, floor condition, electrical supply, heater or emitter arrangement, ventilation and service clearance. For an outdoor cabin, add drainage around the base, exposure to weather and a maintenance path around the exterior.

02 · COLD PLUNGE

Plan the tub and equipment together

Define the filled position, tub access, chiller or integrated equipment location, ventilation, heat rejection, water supply, drainage and a route for cleaning and service. Separated equipment also needs agreed pipe length, protection and access.

03 · HOT TUB

Allow for load, water and heating

Confirm the filled load, level base, delivery path, water and drainage plan, safe entry, operating clearance and the selected heating arrangement. A wood-fired system also needs flue positioning and local professional checks appropriate to the site.

Bropool outdoor sauna concept visualization for placement planning
Outdoor sauna concept visual for base, exposure and access planning; it is not a completed customer installation.
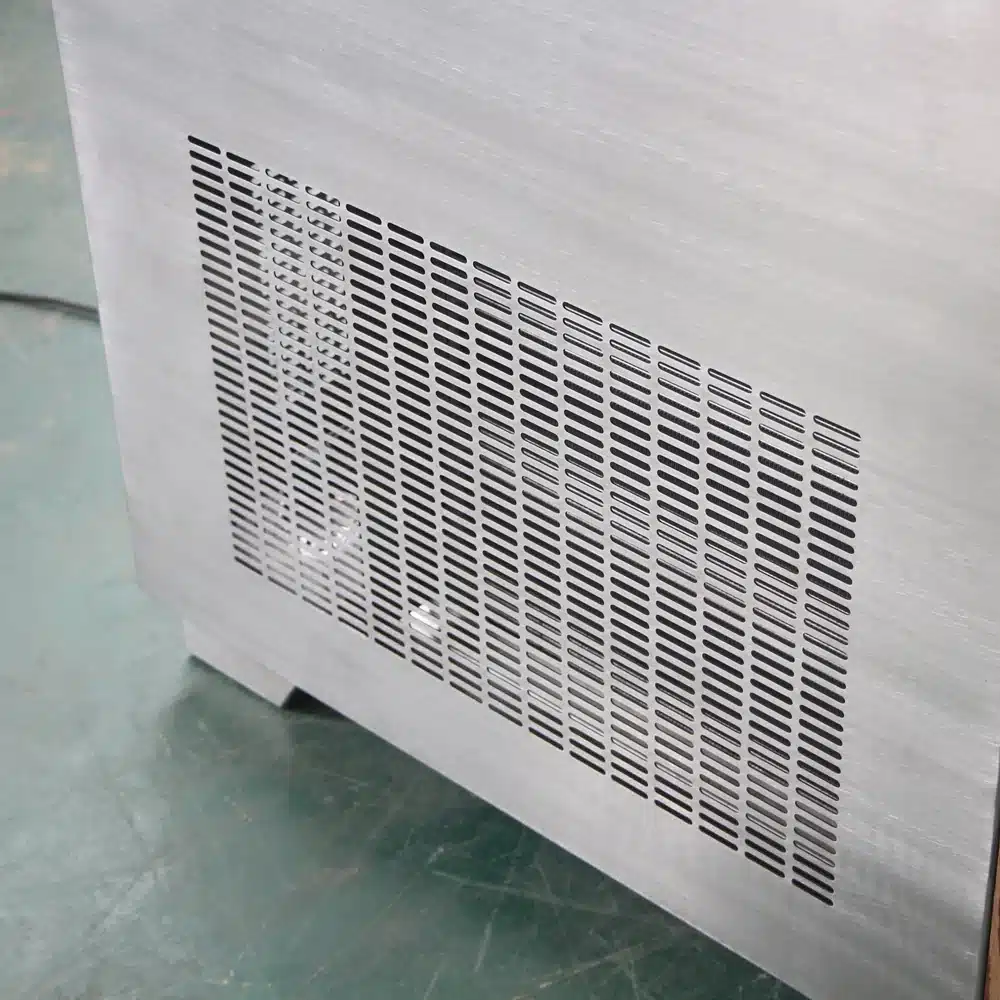
Bropool CT-22 cold plunge ventilation and service-side detail
CT-22 service-side detail for ventilation and maintenance-clearance discussion.
Bropool HT-106 stainless flue terminal detail in an outdoor setting
HT-106 flue terminal detail for heating-route and site-clearance discussion.

Before model approval

Complete a practical site survey

The survey should show where the product enters, how it is moved, where it rests and how each connection reaches it. Measure the narrowest doorway, gate, turn and ceiling point rather than relying only on room dimensions. Note stairs, lifts, soft ground, finished floors and any lifting restrictions.

  • Destination country and installation address
  • Indoor, covered or outdoor position
  • Narrowest delivery and assembly dimensions
  • Base, floor level and load review
  • Power route and isolation location
  • Water fill and drainage method
  • Ventilation, heat rejection and service space
  • Installer roles and required approvals

Keep service panels, ventilation openings and connection points accessible. The final allowance must come from the selected model information and the project team’s site checks.

Bropool CT-22 cold plunge ventilation and service-side detail
A service-side detail helps the site team discuss airflow and maintenance access. Required clearance remains specific to the selected model.

Delivery and assembly

Protect the project from access surprises

Product dimensions alone do not prove that delivery is workable. The team should compare the packaged size, unpacking area, lifting method and assembly sequence with the real path from vehicle to final position. Resolve this while product choices and site preparation can still change.

01

Measure

Record gates, doors, corridors, turns, stairs, lifts and the final working area. Include height limits and surface conditions.

02

Compare

Match those limits with packaged and assembled dimensions available for the proposed model. Allow handling space rather than using an exact fit.

03

Assign

Name who will unload, move, assemble, connect and inspect the product. Confirm any lifting equipment and site protection before arrival.

04

Prepare

Finish the base and agreed services, keep the route clear and arrange the local professionals needed for final connection and commissioning.

Utilities and clearances

Agree every interface in writing

Bropool product information identifies connections and operating needs for the selected configuration. The project team uses that information to design the site-side power, water, drainage, ventilation and protective measures. If the model or destination changes, recheck the affected interfaces before work continues.

InterfaceProject question
PowerWhat voltage, frequency, circuit, isolation and qualified connection method apply at the site?
WaterHow will the product be filled, managed and emptied without damaging the surrounding area?
AirflowCan ventilation openings and equipment heat rejection remain unobstructed during use and service?
BaseIs the finished surface level, stable, drained where needed and suitable for the completed installation?
ClearanceCan doors, covers, panels, heaters, flues and service points be reached safely after installation?
Bropool HT-106 stainless flue terminal detail in an outdoor setting
HT-106 flue terminal detail. Flue design, clearances and local approval must be confirmed for the exact product and site.

Common questions

Installation planning questions from project buyers

When should installation planning begin?

Begin before the final model and configuration are approved. Early measurements and utility checks give the buyer more options if access, base preparation or service capacity does not suit the first choice.

Can Bropool approve my finished site?

Bropool can answer product-specific questions and provide available information for the quoted configuration. Qualified local professionals must assess the site, applicable codes, permits, structure, utilities and final connections.

Can installation be planned from product photographs?

No. Photographs help explain form and placement, but they do not establish exact dimensions, tolerances, connection positions or required clearances. Use information tied to the selected model and order.

What should I send with an installation question?

Send the product family and model, destination, site type, access measurements, base information, available power, water and drainage details, proposed equipment position and the specific point your project team needs clarified.

What happens if the model changes after site work begins?

Pause the affected work and compare the new configuration with access, base, utilities, ventilation, drainage and clearances. Update responsibilities and dimensions in writing before continuing.

Next step

Send the site constraints before the order is frozen

Tell Bropool which product you are considering, where it will be installed and which access or utility limits matter. Include simple measurements, a site plan or clear photographs when available. Bropool can use those details to discuss a suitable model path and the information needed for quotation.

Project enquiry

Send the model, order context and question for review.

Share the company, destination, product direction and decision you need Bropool to review. The team will use the selected page and your message as the starting context.

Preparing the secure form…